
The User Management page lets you manage who has access to your Business App. You can view all current users, invite new team members, set permissions for each person, and remove users who no longer need access.
To open this page, go to Administration > User Management.
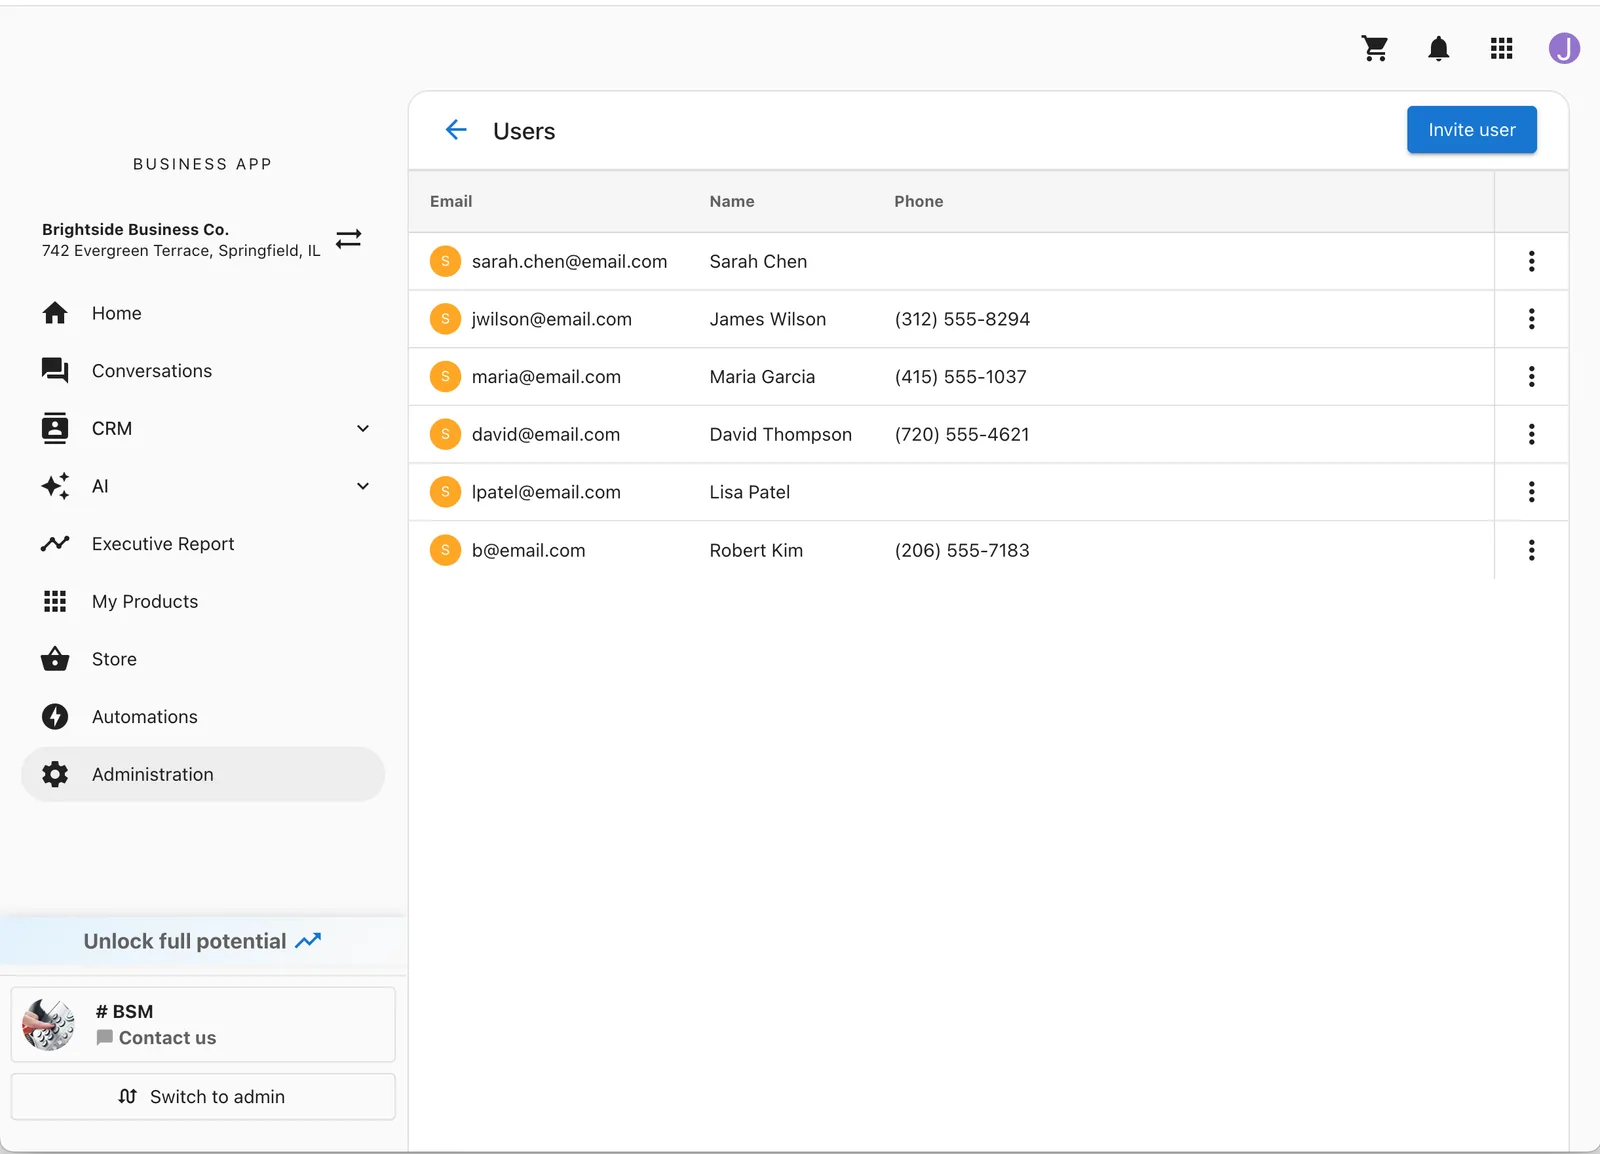
View users
The User Management page displays a table of everyone who has access to your Business App. Each row shows the user's profile image and:
- Name
- Phone
Each row also has an actions menu (three dots) with options to Edit contact info, Edit Permissions, or Remove user.
Results load in pages, so the table stays responsive even for accounts with a large number of users.
Invite a user
- On the User Management page, click Invite user.
- In the Add team member sidebar, fill in the following fields:
- First name (optional)
- Last name (optional)
- Email (required)
- Phone (optional)
- Under Permissions, choose which tabs this user can access. All tabs are selected by default. Uncheck any tabs you do not want this user to see.
- Click Send.
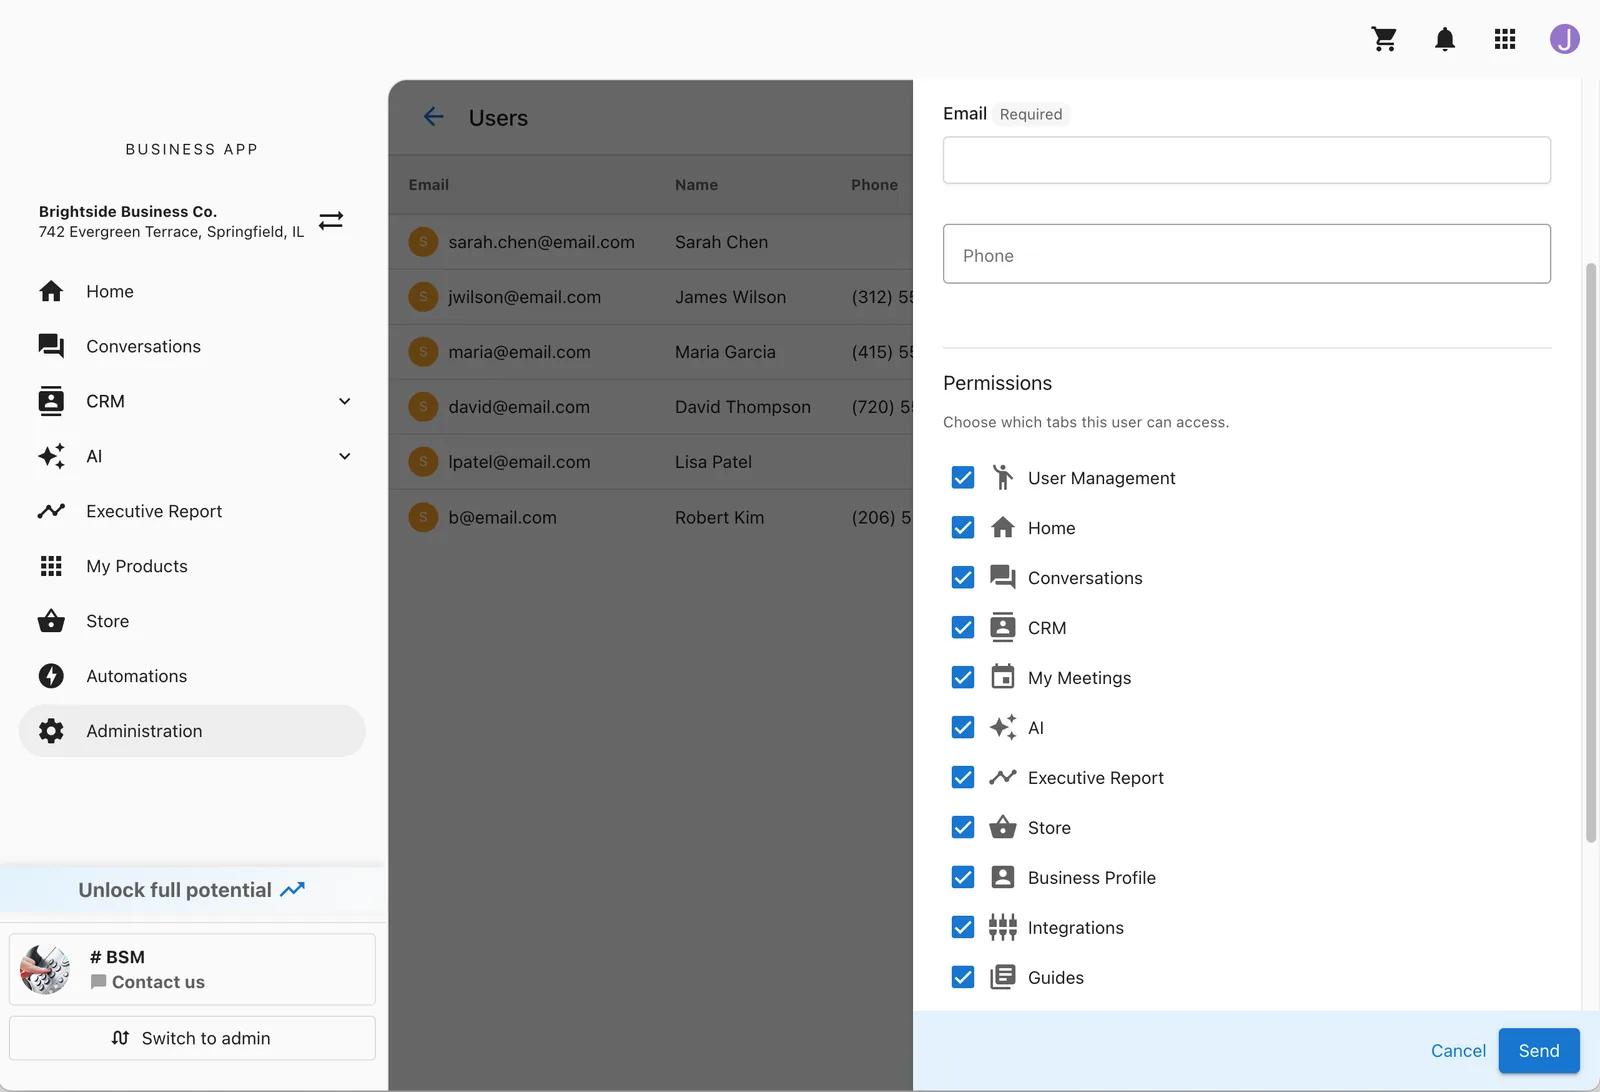
The invited user receives a welcome email with instructions to access your Business App. If a user with that email address is already associated with your business, you receive an error message.
Edit permissions
You can change which tabs a user can access at any time.
- On the User Management page, find the user you want to update.
- Click the actions menu (three dots) on that user's row.
- Select Edit Permissions.
- Check or uncheck tabs to adjust what this user can see.
- Click Save.
Changes take effect immediately.
Edit a user's profile
If you have User Management permissions, you can update another team member's contact details on their behalf — including their name, email, and phone number.
- On the User Management page, find the user whose information you want to update.
- Click the actions menu (three dots) on that user's row.
- Select Edit contact info.
- In the sidebar, update any of the following fields:
- First name
- Last name
- Phone
- Click Save.
Changes take effect immediately. You can also update your own email address, name, and phone number directly from your account settings.
Remove a user
- On the User Management page, find the user you want to remove.
- Click the actions menu (three dots) on that user's row.
- Select Remove user.
- In the confirmation dialog, review the user's name and click Remove user to confirm.
Frequently Asked Questions (FAQs)
Go to Administration > User Management. The URL ends with administration/users after your business ID.
The user receives a welcome email with instructions to set up their account and access your Business App. They appear in the users table once the invitation is sent.
Permissions control which tabs a user can see in Business App. For example, you can give a team member access to Conversations and CRM but hide Store and Automations. You set permissions when inviting a user and can update them at any time from the actions menu.
Yes. If you have User Management permissions, you can update another team member's contact details — including their name, email, and phone number — by selecting Edit contact info from the actions menu on their row. You can also update their permissions at any time. Users can also edit their own profile details from their account settings.
A user is someone who can log in to your Business App and use its features. A contact is a person stored in your CRM (such as a customer or lead) who does not have access to Business App. These are separate systems — removing a contact does not remove a user, and vice versa.
Yes. After removing a user, you can invite them again by clicking Invite user and entering their email address. They receive a new welcome email.
No. You can invite as many team members as you need.
Yes. When a user is added or removed, it is automatically logged in your CRM activity feed — on both the company record and the contact record. The log includes who performed the action and which account it was for.