
Publishing a campaign does not send it automatically. After you publish, you need to add contacts or a list as recipients to begin sending. You can do this directly from the Contacts table, through an automation from Contacts, or by starting an automation from a List.
Prerequisites
Before you can send a campaign, make sure you have:
How to send a campaign
Add contacts directly to a campaign
Use this method to send a campaign to one or more specific contacts immediately or on a schedule.
- Go to CRM > Contacts
- Select one or more contacts using the checkboxes
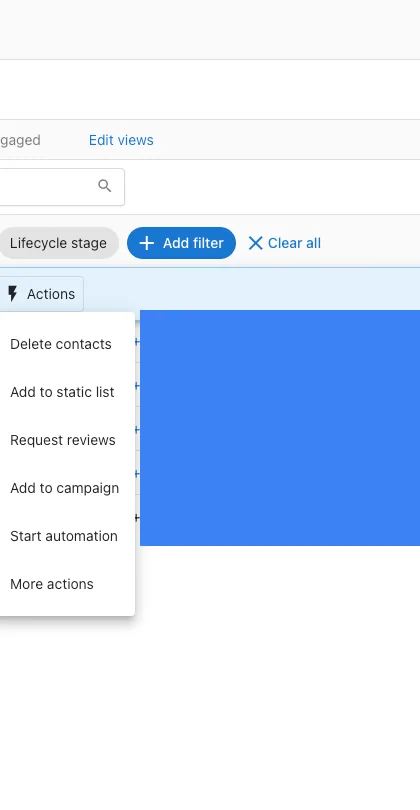
- Click
Actionsin the bulk action bar
-
Select
Add to campaign -
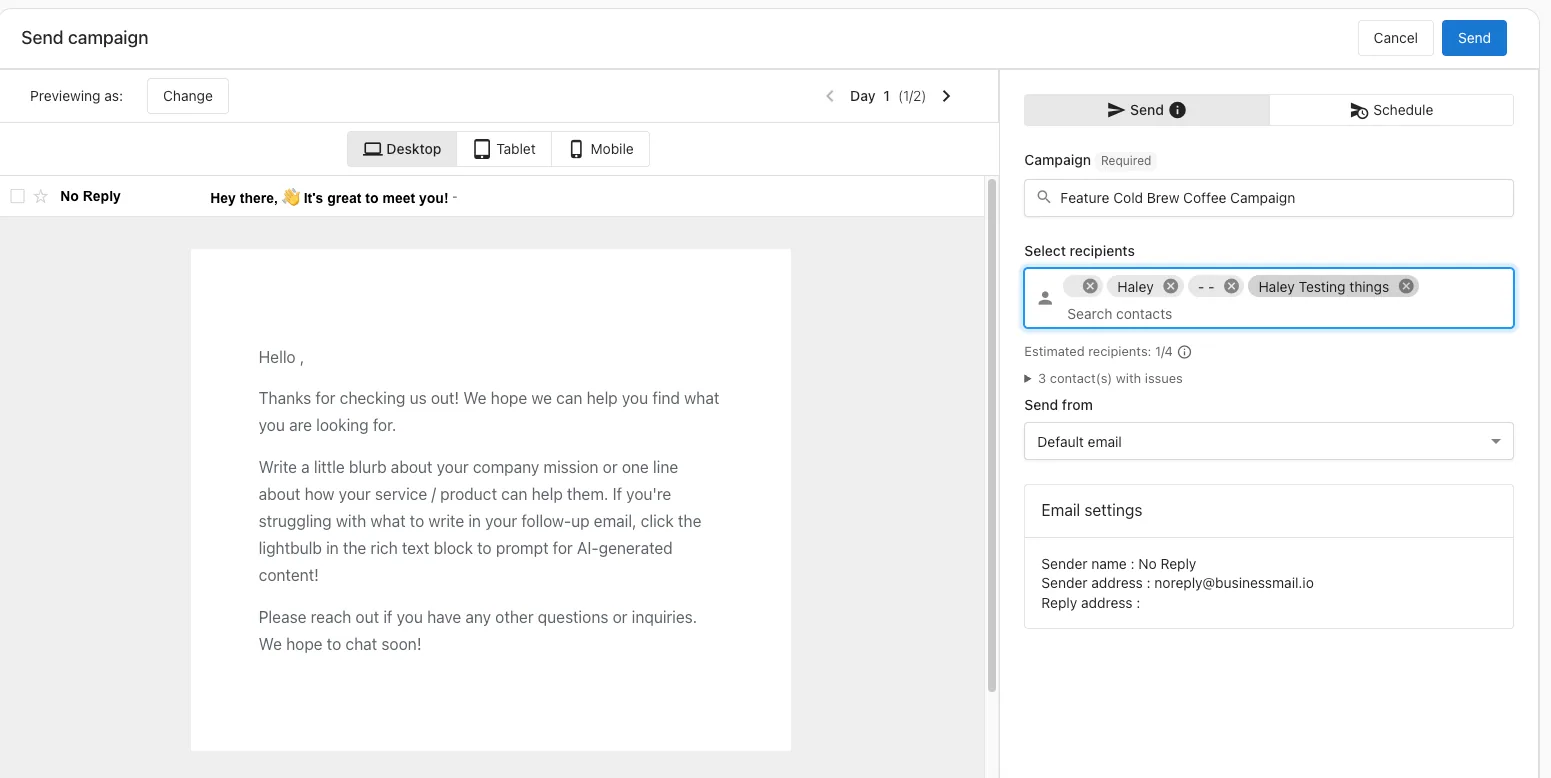
On the Send campaign page:
- Choose your campaign from the dropdown
- Review or adjust the recipient list
- Select a Send from address
- Preview the email using the Desktop, Tablet, or Mobile view tabs
-
To send immediately, click
Send -
To schedule for a later time, select the Schedule tab, set your date and time, then confirm
Start an automation from Contacts
Use this method to enroll selected contacts into a campaign-based automation workflow.
- Go to CRM > Contacts
- Select one or more contacts using the checkboxes
- Click
Actions>Start automation - Select a campaign-based automation to enroll the selected contacts
The automation runs immediately for the selected contacts and enrolls them according to the automation's configured steps and delays.
Start an automation from a List
Use this method to enroll all current members of a list into a campaign at once.
- Go to CRM > Lists
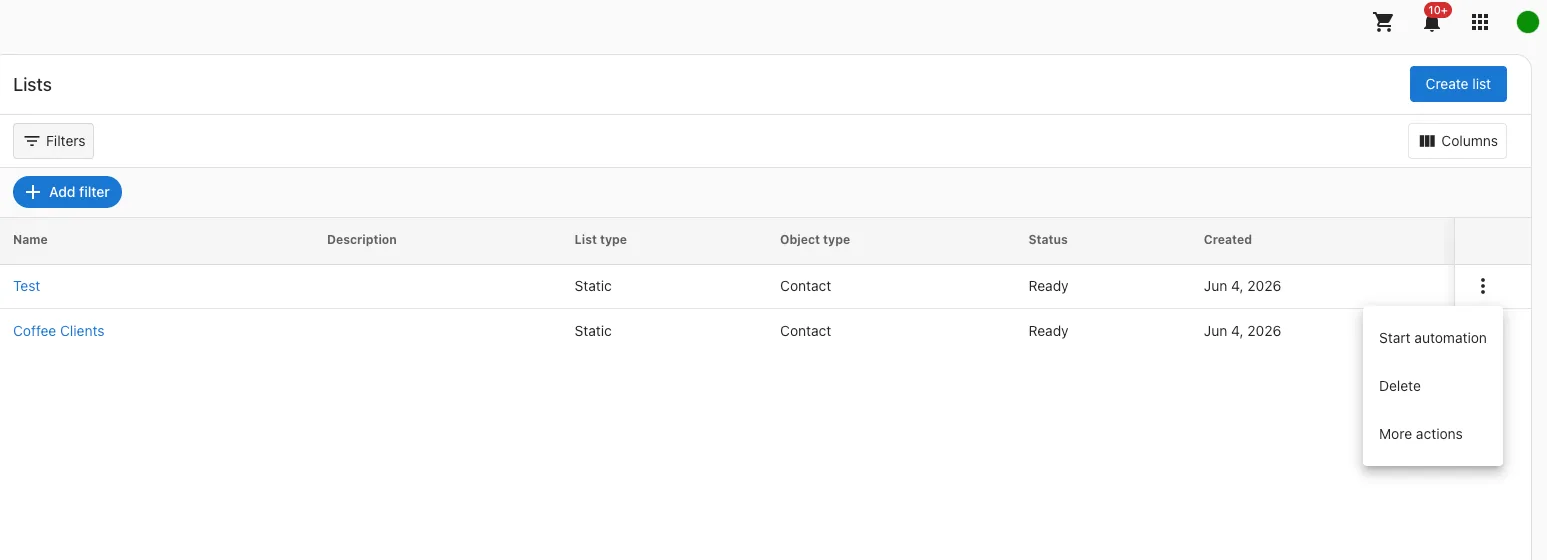
- Find your list and click the three-dot menu (
...)
- Select
More actions
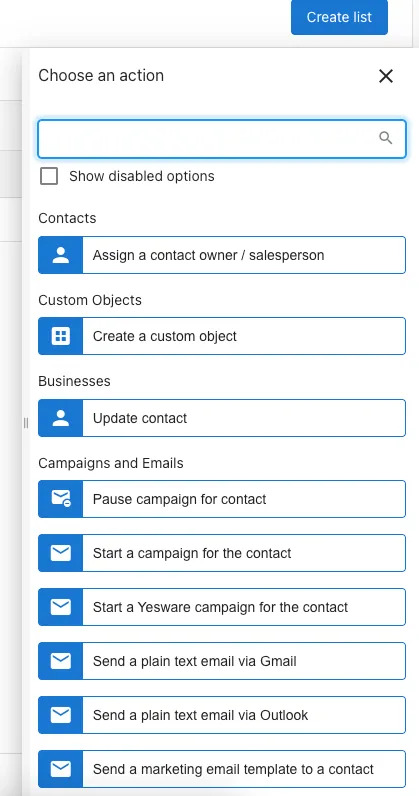
- In the Choose an action panel, select
Start a campaign for the contactunder Campaigns and Emails
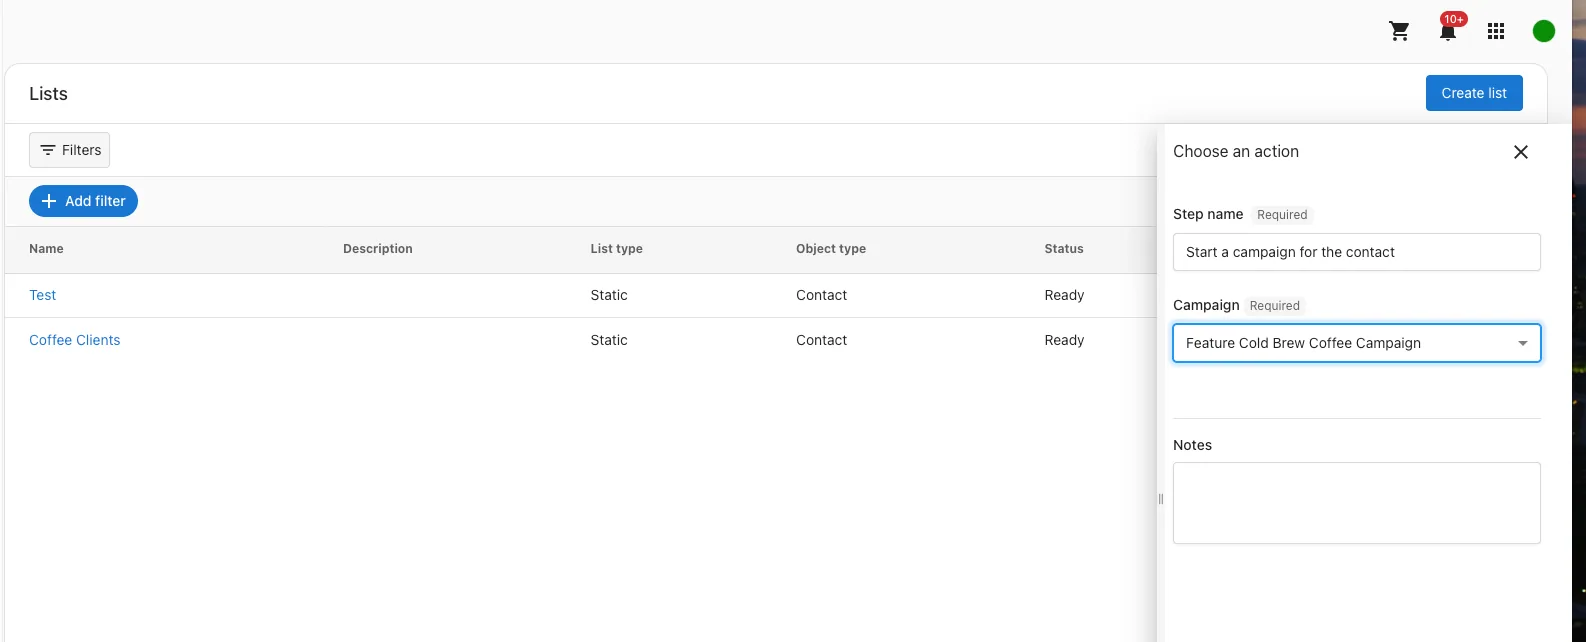
- Enter a step name
- Choose your campaign from the Campaign dropdown
- Click
Runto start the campaign
The campaign starts immediately for all current members of the list. Contacts added to the list after this point are not enrolled unless you repeat the action or configure a membership trigger.
Send campaign page
When you add contacts directly to a campaign, the Send campaign page gives you a full overview before you confirm.
- Email preview: Switch between Desktop, Tablet, and Mobile views to see how the email renders
- Day navigation: Use the arrows to browse through each step in a multi-step campaign
- Campaign selection: Choose which published campaign to send
- Recipients panel: Add or remove individual contacts before sending
- Send from address: Select which sender address to use for this send
- Email settings summary: Review the sender name, sender address, and reply address
- Estimated recipients: The total number of contacts that have the required information for each step in the campaign — email addresses for email steps and phone numbers for SMS steps
Frequently Asked Questions
Publishing a campaign makes it available to send, but does not trigger sending automatically. You need to add recipients using one of the three methods above.
Contacts with issues are contacts that are missing the required information for a campaign step — an email address for email steps, or a phone number for SMS steps. They appear in the Send campaign page but are excluded from the estimated recipient count and will not receive that step.
Yes. On the Send campaign page, select the Schedule tab instead of sending immediately, then choose the date and time for delivery.
Yes. You can add eligible contacts or lists to an active campaign at any time. New recipients start from the beginning of the sequence.
Sending directly (via Add to campaign) gives you a real-time preview and lets you confirm or schedule the send immediately. Using Start automation enrolls contacts into a workflow that may include delays, conditions, and other steps beyond just sending an email.
No. Starting an automation from a list enrolls only the current members at the time you run it. To automatically enroll future members, set up a membership trigger automation instead. See Lists.
Yes. On the Send campaign page, use the Day navigation arrows to move through each step in the sequence and preview how each email will look.
Yes. The Send campaign page includes a Send from dropdown where you can select which sender address to use for that send.
Go to CRM > Lists and click Create to set up a static or smart list. Once your list has members, you can use it to start a campaign automation. See Lists.
Go to Campaigns and click on the campaign you want to review. The Campaign Details page shows recipient counts, in-progress and completed statuses, and email performance metrics including delivery rate, open rate, click-to-open rate, dropped, and bounced. Each email step also shows its individual delivered, pending, open rate, and click rate.
Contacts already enrolled in a campaign will not receive duplicate emails. Only new eligible recipients are added to the send.
Yes. Open the campaign, navigate to the recipients list, and remove the contact. They will not receive any remaining steps in the sequence.